Week 97 – Opening shot

posted in: Concept arts, Textures | 0

Hey everyone!

We’ll do a quick update this week, since we are all way over our head with all the stuff that needs to be done before Christmas…

Usually, we use rendered 3d lights to light our scenes, but we decided to do a little different for the first few shots of the film and paint the lighting directly in the textures like in a good old 2D background. As an example, here’s a matte painting for the opening shot of the film!

001_020

Happy Christmas shopping everyone! 🙂

12_04_thom_SMALL

Week 95 – Camera Projections

posted in: Textures | 5

Only four updates left before Christmas! A little vacation won’t hurt!

With less than three shots left to animate, we can safely say that the hardest part of the film is behind us. Nevertheless, we still got a lot of texture projections to do in order to get that painterly feel we are after. Here’s a few before/after of projections that we did recently!

projection1

projection2

projection3

For those of you who are wondering why the textures were so low resolution to begin with, well it all comes down to the fact that if we added too many details on the base textures, as soon as we would have stepped back the camera we would have lost the painterly feeling. Another reason is that since the film is taking place in a lot of different areas, it would have taken forever to detail every little corner. To overcome this problem, the logical solution was to do only the minimum we needed on the initial texture work, and then paint exactly the look we wanted using camera projections once the animation was completed.

Well, that’s it, we hoped you enjoyed this post. Thanks and see you soon!

11_20_thom

Week 81 – Teaser soon

posted in: Textures | 1

That’s right, we’re working right now on a teaser for the film! We can’t tell you just yet when we expect to put it online, but here’s a little sneak peek to keep you waiting :

We reworked a lot of shots lately and came up with some pretty cool ambiences. We can’t wait to show you all of this! In the meantime, here’s a few textures that were done in the last week for a sequence that takes place in the forest :


That’s it for this week! Come back soon for more exciting news on Le Gouffre™!

Week 79 – Sky Matte Paintings

posted in: Textures | 5

One thing we wanted from the very beginning with this film was to be able to paint a new custom sky for every shot. Many ideas were cut because of time constraints, but we’re very happy that the skies aren’t one of them because it adds this nice aesthetic appeal as well as allow us to work out the clouds so that they compliment the compositions perfectly. So for this week’s post, here are a few of the matte paintings that were done in the last few days!

And as a little bonus, here’s a new composited shot featuring the mill and villagers in broad day light. Click to see in full size!

Well, that’s it for this time. We hope you’re enjoying your summer, and stay tuned for exciting news coming up on Le Gouffre this fall. Also, don’t forget to subscribe to our Facebook to always be up to date with the latest happenings!

Week 75 – Cliff Textures in ZBrush

posted in: Textures | 9

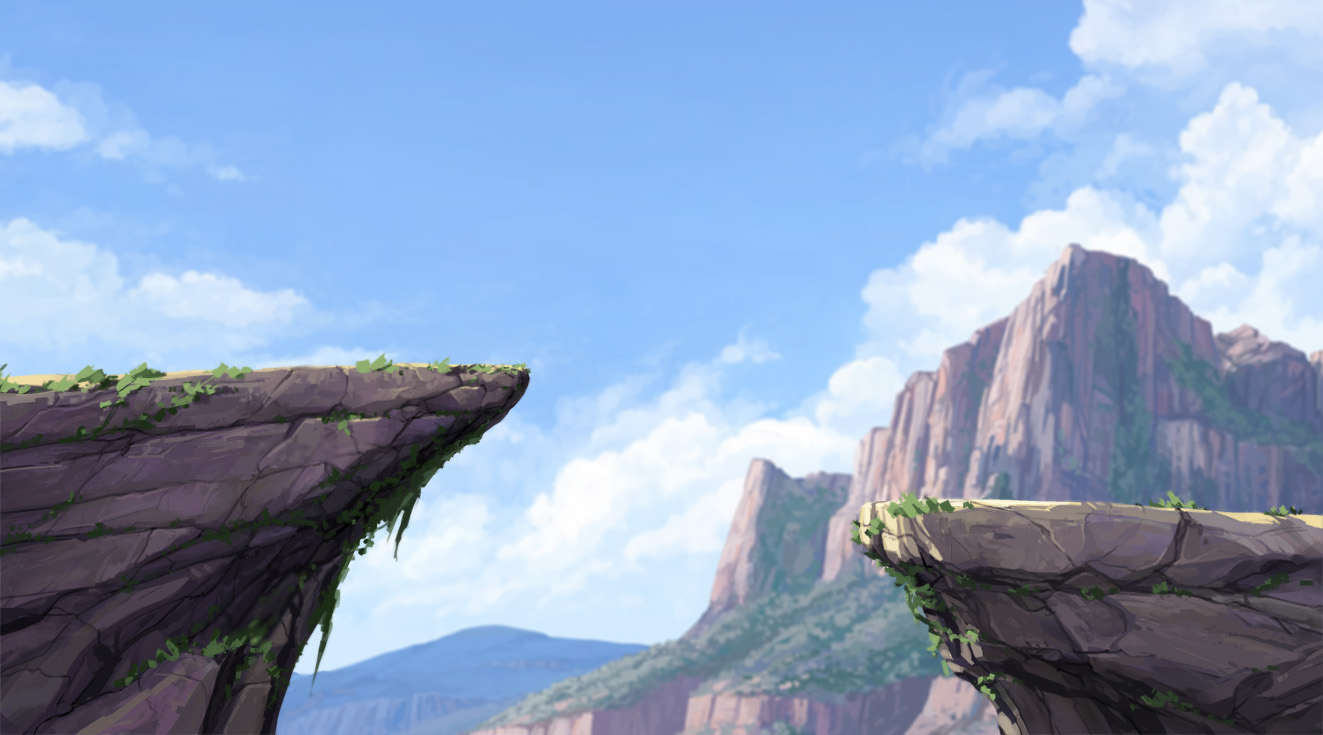
Many people told us that they would like to know how we did our cliff textures, so we’re going to show you just that in this week’s post. Beware to the non-initiates, it might be a little technical!

Now, what you must know is that the canyon in our movie is enormous and in order to obtain sufficient resolution everywhere, we had no choice but to separate it in multiple pieces and work the textures separately. Of course, a lot of work went into working the pieces seams to make the whole thing imperceptible.

While the biggest part of the work was done in ZBrush and Photoshop, the first step was in Softimage, where we had to find the right dimension for each cliff piece. Once done, a first layer of subdivision and modeling was applied to have enough detail to work once in ZBrush.

Here is what the first version of one of our cliff piece looked like right out of Softimage. At this stage, the Uvs have already been unfolded and will adapt once we start subdividing the model.

The second step is to subdivide the model as much as possible and sculpt the cliff until the result is a little more realistic.

It’s now time to use a very useful technique we discovered, which consist in literally projecting the ZBrush shading onto the surface of the geometry using ZAppLink. This way, we obtain a good texture base that follows the details of the sculpt. Then we only have to refine the lines, still in ZAppLink, to obtain the following result :

Since the Uvs have already been unfolded, we can simply export the texture in Photoshop and use this painting as a base to add color and smaller details. Here’s the final texture :

The nice part about all this is that since the texture was made using the sculpt itself as a base, the details of the cliff follow the modeling very closely once we add lights!

Well that’s it, I hope it wasn’t too hard to follow. Feel free to leave a comment if you have any more questions, and see you next time!

1 2 3 6